










A 10-by-10 booth can disappear quickly when every neighboring exhibitor is using bright colors, oversized claims, and too much copy. This expo booth graphics case study follows a common New York event situation: a growing B2B company had a confirmed booth, a short production window, and a message that needed to land in seconds.
The goal was not to fill every available inch with branding. It was to create a booth that people could identify from the aisle, understand at a glance, and remember after a busy day on the show floor.
The Booth Challenge
The exhibitor was a local business-services company attending a regional industry expo at the Javits Center. Its sales team wanted the booth to generate qualified conversations, not just hand out brochures. They had a standard 10-by-10 space, a six-foot table, two staff members, and a product demonstration running on a monitor.
Their original artwork included a large logo, five service categories, three paragraphs of company background, several stock photos, a QR code, social media icons, and contact information. Every item was technically relevant. Together, they made the booth hard to read from more than a few feet away.
The deadline added pressure. The event was less than a week away, and the team needed graphics that could be produced quickly, packed safely, and installed without specialized labor. The project called for practical trade show materials, not a custom-built exhibit with a long fabrication schedule.
Expo Booth Graphics Case Study: The Design Decision
The first decision was to reduce the message. Trade show attendees do not stand in the aisle to read a company history. They scan for relevance, then decide whether to step closer. The revised graphic plan used a simple hierarchy: brand name, one clear benefit statement, three supporting proof points, and one direct call to action.
The benefit statement was set in large type high on the back wall: “Reduce Project Delays Before They Start.” It addressed the visitor’s problem instead of describing the exhibitor’s internal service categories. Under it, three short proof points gave staff a starting point for conversations: faster approvals, clear reporting, and local support.
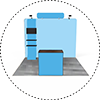
The team selected a straight tension-fabric backdrop for the primary visual field. This created one continuous branded surface behind the table and monitor, without the visual breaks that can come from several narrow displays placed side by side. A retractable banner stand at the open aisle edge carried the call to action and QR code, so visitors could scan without walking into the booth.
This split mattered. A back wall needs to communicate at distance. An aisle-facing banner needs to convert interest into a next step. Asking one graphic to do both often results in small text and competing priorities.
Color and Image Choices
The client’s brand palette used navy, light blue, and white. The original concept placed light-blue text over a photographic city background. On screen, it looked energetic. At event scale, it risked weak contrast under venue lighting.
The final backdrop used a solid navy field with white type, plus one cropped, high-resolution image placed on the far side of the design. The image supported the message without sitting behind the headline. Light blue appeared as an accent color for icons and key dividers.
This was a practical production choice as much as a creative one. Large-format graphics need enough contrast to remain readable from the aisle. Fine gradients, pale type, and busy images can look softer at full size than they do on a laptop screen. A proof review should always consider viewing distance, lighting, and the material being printed.
The Display Package
The finished booth used a focused set of event graphics: a tension-fabric backdrop, one retractable banner stand, a fitted table throw, two rigid counter signs, and branded decals for the demonstration monitor area. The package gave the booth a consistent appearance without turning it into a crowded retail display.
The table throw carried only the logo. That left the tabletop clear for brochures, a lead-capture device, and a small product sample. The rigid signs were placed on the table at eye level for visitors already inside the booth. One explained the demo in three steps; the other listed the appointment incentive.
The retractable banner was intentionally narrow in scope. It featured a short invitation to book a consultation, a QR code, and one visual cue pointing visitors toward the booth. It did not repeat the entire backdrop message. Repetition is useful for brand recognition, but duplicate copy can waste valuable display space.
For exhibitors working with a larger footprint, the same approach can extend to SEG displays, lightboxes, hanging signs, or multiple branded zones. The principle stays the same: assign each graphic a job. One may pull traffic from the aisle, another may establish credibility, and a third may support a close-up conversation.
Production Details That Protected the Deadline
Artwork readiness had a direct effect on turnaround. The client supplied vector logo files, approved brand colors, and high-resolution imagery. That avoided a common delay: discovering that a web-sized image cannot print cleanly across an eight-foot backdrop.
Before production, the team checked panel dimensions, bleed requirements, safe areas, font treatment, and QR code size. The QR code was tested from a phone at a realistic distance. It also had enough clear space around it to scan reliably. A code that is too small or crowded by text may look fine but fail when a visitor tries to use it in a busy aisle.
Material selection depended on the display hardware. Fabric graphics were chosen for the backdrop because they travel compactly, install cleanly, and avoid glare compared with some glossy media. The retractable banner used a smooth banner material suited to its stand. Rigid signs were selected for stability on the tabletop.
Same-day banner printing can be a major advantage when a schedule shifts, but speed works best when decisions are made early. A late change to a headline is manageable. A late change to the display size, hardware type, or low-resolution artwork can affect the entire job. Print Banners NYC helps exhibitors match the graphic format to the event setup before the production clock gets tight.
What Changed on the Show Floor
The redesigned booth gave the sales team a more usable environment. From the main aisle, visitors could see the company name and understand the main benefit without stopping. Once they approached, the proof points and demo signs gave them quick context.
The staff also reported better opening conversations. Instead of explaining what the company did from scratch, they could ask visitors whether project delays were affecting their teams. The headline had already framed the problem, making the first interaction more specific.
The QR code produced leads, but it was not treated as the only conversion path. Some attendees preferred a quick discussion, while others wanted a brochure or business card. The physical booth graphics supported all three behaviors. That is a better expectation for an expo than assuming every visitor will scan a code.
There were trade-offs. The team removed detailed service descriptions that might have answered a few technical questions. Those details moved to a one-page handout and the staff conversation instead. For a booth with limited space, that was the right compromise. If the company had a 20-by-20 island exhibit with multiple meeting areas, more detailed panels could have been useful.
Lessons for Your Next Expo Booth
The strongest takeaway from this expo booth graphics case study is that visibility and clarity come before volume. A booth does not need to display every product, credential, and contact channel. It needs to make the right visitor pause.
Start with the aisle view. Can someone understand your offer in three seconds? Then work inward. Give visitors who stop a reason to engage, and give your staff tools that support the conversation. Choose display hardware that fits the booth footprint, venue rules, transportation plan, and setup time.
When the event date is close, keep the approval process disciplined. Confirm the booth dimensions, finalize the primary message, supply print-ready files, and select the hardware before adding extra graphics. The last useful piece of advice is simple: make each panel earn its place on the floor. A clear message printed well and delivered on time will do more work than a booth full of graphics competing for attention.