









A booth can be fully booked, staffed, and stocked - then still disappear into the expo hall if the graphics are late, undersized, or hard to read from the aisle. Rush expo graphics printing is built for the moment when setup is close, the event date is fixed, and your branded display still needs to look intentional. For NYC exhibitors, that usually means making fast decisions without settling for random, mismatched signage.
The right rush order starts with the job the graphic needs to do. A backdrop handles brand recognition and photos. A retractable banner stand delivers a short message at the edge of a booth. Rigid signs direct traffic, explain offers, and post pricing. When every item has a defined purpose, quick production becomes much easier to manage.
When Rush Expo Graphics Printing Is the Right Call
Rush production is not only for last-minute mistakes. It is also practical when event details change late, a sponsor is added, a product launch moves up, or a marketing team needs to refresh an existing booth before a new show. In New York, where venue schedules, deliveries, and installation windows can be tight, local production can remove days from the process.
The trade-off is that rush work leaves less room for revision. If the artwork is unfinished, dimensions are unclear, or approvals are still pending, the fastest print schedule will not solve the real delay. Before submitting files, confirm the final copy, logo version, contact details, and the display size required by the event.
Same-day banner printing can be a strong option for simpler, print-ready items. Larger booth builds, custom structures, specialty finishes, and complex installation jobs may require more lead time. The best approach is to prioritize the graphics attendees will see first, then add secondary pieces if the schedule allows.
Start With the Expo Space, Not the Print Product
A common rush-order mistake is choosing a product before checking the booth footprint and venue rules. Start with the space you have: an inline table, a 10-by-10 booth, a corner exhibit, a lobby activation, or a sponsored speaking area. From there, identify where attendees will approach and what they should notice in the first three seconds.
For a small booth, one clear backdrop or a tall retractable banner can do more than several small signs competing for attention. A table throw adds brand coverage at eye level when guests are standing nearby, while a tabletop sign can support a product demo or lead-capture station. If you have an empty wall, a fabric display, SEG frame, or adhesive graphic may be a better use of the surface than another floor-standing sign.
For larger exhibits, use scale to create hierarchy. Your company name and core visual should be visible across the aisle. Product categories, services, or key claims belong closer to the booth. Fine details such as QR codes, price sheets, and appointment instructions should be placed where someone can stop and read them.
Choosing Rush Expo Graphics Printing by Display Type
Different print formats solve different expo problems. The fastest choice is not always the smallest item. It is the product that gives your team the most visibility for the available time, budget, and setup conditions.
Banners and backdrops
Vinyl banners are a practical choice for booth walls, sponsor recognition, directional messaging, and event promotions. They are available in a wide range of sizes and work well when you need bold color and large lettering. Add grommets, pole pockets, or other finishing options based on how the banner will be hung.
Step-and-repeat backdrops are useful for press moments, photo activations, influencer appearances, and sponsor events. Keep the logo pattern simple and test it at photo distance. Small logos may look fine on a screen but become hard to recognize in a wide event photo.
Banner stands and portable displays
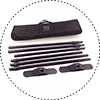
Retractable banner stands are one of the most practical expo products because they travel easily, set up quickly, and create vertical visibility without requiring a full booth system. Use them for a single service, new product, show special, or call to action. Avoid trying to fit an entire company brochure on one panel.
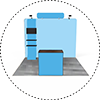
Portable fabric displays, tension backdrops, and SEG displays provide a more finished presentation when your booth needs a larger branded surface. They can create a stronger visual impact than individual signs, but hardware compatibility and production time should be confirmed early for a rush order.
Rigid signs, posters, and decals
Foam board, PVC, acrylic, and other rigid sign materials are well suited to pricing, schedules, product features, event directions, and countertop messaging. The best material depends on whether the sign needs to stand, mount, travel, or hold up in a busy environment.
Posters work well for short-term promotions and can be mounted in frames, easels, or display holders. Decals are useful for branded counters, windows, giveaway cases, floor messaging, and temporary booth surfaces. Measure carefully before ordering decals, especially if they must fit existing furniture or fixtures.
Build Artwork for a Busy Aisle
Expo graphics are not read like a webpage. Attendees are walking, talking, carrying bags, and looking at multiple booths at once. Your design needs to communicate quickly from several feet away.
Lead with one message. That can be a product benefit, a short question, a show-only offer, or a direct category statement. Support it with a clear visual and a simple action, such as booking a demo, scanning a code, or visiting a location. If everything is emphasized, nothing is.
Use high-resolution images at the final print size. A photo that looks sharp in a small email preview may become blurry when enlarged for a backdrop. Vector logo files are preferred for clean edges, and brand colors should be supplied consistently across every item. If your booth uses multiple formats, carry the same headline, color palette, and visual style across banners, signs, table throws, and handouts.
QR codes deserve extra attention. Make them large enough to scan at a natural standing distance, leave clear space around them, and test them from a phone before printing. A QR code that only works when someone stands six inches from the banner will slow down traffic instead of capturing it.
A Rush-Order Checklist That Prevents Reprints
Before sending an expo print order into production, check the details that can cause expensive problems at setup:
- Confirm final dimensions, including bleed, safe area, and the visible area of any display hardware.
- Make sure logos, photos, and QR codes are high resolution and approved for use.
- Verify all dates, booth numbers, phone numbers, web addresses, and promotional terms.
- Match finishing and hardware to the installation plan, including grommets, bases, frames, stands, or mounting materials.
- Ask about turnaround, pickup or delivery timing, and the latest acceptable proof approval time.
Plan for Setup Day, Not Just Print Completion
A graphic is only useful if it arrives ready to install. Think through transport, elevators, loading docks, check-in procedures, and the tools your team will have on site. A rigid sign may need an easel. A banner may need hooks or zip ties. A fabric display may need its frame packed with the print.
For urgent NYC events, pickup can be the most predictable option when timing is critical. If delivery is required, build in a buffer for venue receiving rules and traffic. Label packages clearly and keep a photo of the approved artwork on your phone so setup staff can quickly confirm that every piece is present.
Print Banners NYC helps businesses and exhibitors move from approved artwork to event-ready banners, signs, backdrops, and display materials when the clock is short. The most effective rush order is not the one with the most pieces. It is the one that gives attendees a clear reason to stop at your booth.
When the expo doors open, your graphics should already be doing the first part of the sales conversation: showing people who you are, what you offer, and where to look next.