











A trade show booth can look complete in the office and still fail on the show floor. The banner stand may be missing its pole, the backdrop may not fit the assigned footprint, or the team may arrive without the extension cord needed to power a lightbox. This trade show display checklist is built for exhibitors who need to get set up quickly, look professional, and avoid expensive last-minute fixes.
For New York City events, details matter even more. Freight windows are tight, loading docks are busy, elevators have size limits, and a small booth can compete with hundreds of nearby exhibitors. Start planning the display as a working system, not as a collection of printed pieces.
Start With the Booth Space and Show Rules
Before approving a banner, backdrop, or booth package, confirm what the venue and event organizer actually allow. Your floor plan tells you more than square footage. It shows whether your booth is inline, corner, peninsula, or island space, which affects how many sides of your display visitors can see.
Measure the usable width, depth, and maximum permitted height. An inline booth may have a lower height limit at the sides than in the center. If you order a large backwall without checking those rules, you may have to remove graphics or rework the layout during setup.
Also confirm whether the event provides carpet, table, electricity, internet access, drayage, or basic furnishings. These items are often available, but not always included. A display designed around a counter or monitor needs a fallback plan if rented equipment is delayed or costs more than expected.
Confirm these event details before production
- Booth number, booth type, and exact usable dimensions
- Maximum display height and rules for hanging signs
- Move-in date, target setup time, and dismantle deadline
- Freight delivery address, loading dock requirements, and receiving dates
- Electrical access, internet availability, and venue restrictions on adhesives or rigging
Build the Display Around One Clear Message
A crowded expo aisle is not the place for a paragraph-length company description. Visitors should understand what you offer in a few seconds from several feet away. Lead with the product, service, or outcome that brings people to your booth.
Choose one primary message for the backwall or largest sign. Then use secondary graphics for supporting services, proof points, product categories, or a call to action. If your company offers several services, do not try to give every service equal visual weight. A booth that says everything usually communicates nothing at a glance.
Your logo should be visible, but the logo alone is rarely the message. Pair it with a direct headline such as “Same-Day Event Graphics,” “Commercial Leasing Opportunities,” or “Custom Displays for Retail Launches.” Add a QR code only when it leads to a mobile-friendly page with a clear reason to scan.
Color choices should match your brand while staying readable under venue lighting. Light text on a busy photo background can disappear from a distance. Large type, clean contrast, and simple graphics are usually more effective than a crowded design with multiple small images.
Trade Show Display Checklist: Core Hardware and Graphics
The right combination depends on your booth size, budget, and reuse plans. A 10-by-10 booth often needs a strong backwall, one or two banner stands, and a branded table setup. A larger footprint may justify an SEG fabric display, lightbox, modular booth frame, custom counter, flags, or a step-and-repeat photo area.
Use this trade show display checklist to confirm the physical pieces before you send files to print:
- Main backwall or booth backdrop, sized for the approved booth footprint
- Retractable banner stands or fabric banner stands for aisle-facing messages
- Branded table throw, fitted table cover, or table runner that matches the supplied table size
- Tabletop signs, posters, rigid signs, price cards, and product information displays
- SEG frames, lightboxes, counters, shelves, monitors, or literature holders when included in the booth plan
- Floor decals, directional signs, window decals, or flags if the event permits them
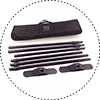
- Carry cases, shipping cases, bases, poles, frame connectors, graphic panels, and replacement parts
A lower-cost banner stand can make sense for a one-time local event. For a display that will travel repeatedly, sturdier hardware and a protective case are usually worth the added cost. The same trade-off applies to rigid signs versus fabric graphics: rigid panels provide a crisp presentation but take up more space, while fabric packs smaller and is easier to transport.
Prepare Print Files for the Actual Display Format
A sharp logo file does not automatically become a sharp 10-foot backdrop. Supply artwork at the production size requested for the item, or use properly scaled files with enough resolution for large-format printing. Vector logos are preferred because they can scale cleanly. If you are using photos, confirm that they are high resolution at final print size.
Build in bleed where needed and keep essential text away from trim lines, hems, grommets, pole pockets, and frame edges. A design may look balanced on screen but lose a phone number or QR code once finishing is applied. For step-and-repeat backdrops, repeat logos at a consistent scale and leave enough spacing so people standing in front of the wall do not block every mark.
Proofread every graphic, including phone numbers, web addresses, event dates, suite numbers, and pricing. Have someone outside the design process review the proof. They are more likely to catch a typo your team has read past ten times.
If the deadline is close, simplify rather than gamble. A clean, correct banner produced on time will do more for your booth than an overdesigned display that arrives late or requires emergency revisions. Print Banners NYC can support urgent New York event graphics, but same-day production still needs approved artwork, confirmed sizing, and realistic pickup or delivery timing.
Pack for Setup, Not Just for Shipping
A display is only useful if your staff can assemble it without searching through loose boxes. Pack each unit with its matching hardware and label every case by booth area: backwall, table, left banner, right banner, counter, or electrical. Include a simple setup sheet with photos if someone other than the regular event team will be handling installation.
Your event kit should include the small items that rarely appear on an order confirmation but regularly save setup time:
- Scissors, utility knife, measuring tape, pens, markers, and zip ties
- Gaffer tape, hook-and-loop strips, command-style hanging strips, and approved adhesive options
- Extension cords, power strips, charging cables, batteries, and a phone charger
- Microfiber cloths, paper towels, hand sanitizer, and touch-up supplies for rigid signs or counters
- Business cards, lead forms, giveaway items, clipboards, and a working QR code test device
Plan Delivery, Labor, and Return Shipping Early
Shipping is where many otherwise strong booths break down. Confirm whether your materials should go to the advance warehouse or directly to the show site. Those destinations have different deadlines, labels, fees, and receiving procedures. A box addressed correctly but missing the booth number or event name can be difficult to locate once it reaches a busy venue.
For local exhibitors, pickup can be the simplest option when the display fits in a car or van. For larger booths, assess loading access, parking, labor requirements, and the distance from the dock to your space. Manhattan venues, hotels, and convention centers may have separate freight entrances and scheduled loading times.
Pack return labels, tape, and shipping paperwork before the event starts. At teardown, people are tired and the floor clears quickly. Photograph cases and contents before sealing them, especially when rented hardware or multi-piece frames are involved.
Run a Final Booth Readiness Check
Two days before move-in, lay out every printed piece and test every display frame. Assemble the banner stands. Plug in the lightbox. Scan the QR code. Place the table throw on the correct table size. This final check catches mismatched graphics, missing connectors, and design problems while there is still time to correct them.
Ask one practical question: can a first-time visitor understand what you do and what to do next within five seconds? If the answer is no, simplify the front-facing graphics before the show opens.
The best booth is not necessarily the biggest one. It is the one that arrives complete, sets up on schedule, and gives your team a clear, confident place to start conversations.