











A missing directional sign, a too-small sponsor backdrop, or a banner stand that arrives without the right hardware can slow down an otherwise well-planned event. Knowing how to order event signage starts with matching each printed piece to its job, its location, and your event deadline. For New York City events, where venues, loading windows, and last-minute changes are common, that planning needs to happen before artwork goes to print.
Start With the Event Signage Job List
Do not begin by choosing materials. Start by walking through the attendee experience. What will people see from the sidewalk, at registration, on the show floor, and at the point where they need to take action? A product launch, trade show booth, retail activation, and corporate meeting all need different sign packages.
For most events, signage falls into a few practical roles: attracting attention, identifying your brand, directing traffic, presenting information, and creating a photo-ready background. A street-facing vinyl banner may attract walk-in traffic. A retractable banner stand can explain services near a registration table. Rigid signs can guide guests to elevators, restrooms, check-in, or breakout rooms. A step-and-repeat backdrop gives sponsors and guests a branded place for photos.
Write down every sign, where it will go, and the message it must communicate. Include the number of copies needed. If you have entrances on multiple sides of a venue, one directional sign is not enough. If your event runs over several floors, include signs for every decision point, not just the main lobby.
Match the Format to the Location
Indoor and outdoor use are not interchangeable. Indoor graphics can prioritize a clean finish and lightweight setup. Outdoor signs need to account for wind, weather, mounting surfaces, and viewing distance. A paper poster may work inside a protected venue, while vinyl banners, rigid boards, or flags are better choices for exterior promotion.
For trade shows and conferences, portable display products reduce setup stress. Retractable banner stands pack down quickly, while pop-up displays, SEG fabric displays, and lightboxes create a larger branded footprint. Table throws turn a standard six-foot or eight-foot table into a branded presentation area without taking up extra floor space.
For storefront promotions, real estate open houses, and community events, consider visibility from a moving vehicle or across a sidewalk. Large vinyl banners, feather flags, window decals, and A-frame-compatible rigid signs can work better than small text-heavy posters.
Choose Size Based on Viewing Distance
The best design can still fail if the sign is too small for the space. Before placing an order, estimate where a person will stand when reading it. A sign at a registration counter can carry smaller details. A banner above a busy entrance needs a short message, large logo, and high-contrast text that reads from a distance.
As a practical rule, the farther the viewer is from the sign, the fewer words it should contain. A 24-by-36-inch poster can handle schedules, menus, or event details viewed up close. A large banner should focus on a headline, logo, date, or call to action. Trying to fit every sponsor, service, and social media handle onto one entrance banner usually creates a message nobody can read.
Also measure the available space. Check wall dimensions, booth regulations, ceiling height, table length, and doorway clearance. NYC venues often have strict rules for elevators, loading docks, and installation methods. A display that fits your booth diagram may not fit into the freight elevator if it is shipped or transported fully assembled.
Prepare Print-Ready Artwork Before Ordering
Production moves faster when your files are complete. Submit artwork at the final print size whenever possible, with images and logos high enough in resolution to stay sharp when enlarged. Low-resolution web images may look acceptable on a phone but print soft or pixelated on a six-foot banner.
Use CMYK color mode for print files when you can. Brand colors can vary between screens and printed materials, especially bright blues, greens, and fluorescent shades. If exact color matching is critical for a major campaign, discuss expectations before production rather than assuming a screen preview represents the final output.
Keep essential text, logos, QR codes, and faces away from edges. Banners may require finishing space for hems, grommets, pole pockets, or hardware. Fabric displays and retractable banners also have safe areas and bleed requirements. A QR code placed too close to a bottom edge may be blocked by a banner stand base or become difficult to scan.
Before approving the file, check the basics: spelling, event dates, venue address, suite or floor number, sponsor logos, phone numbers, and QR code destination. Print errors become expensive when the event opens in a few hours.
Decide Who Owns Final Approval
Marketing, event operations, sponsors, and venue teams may all have input. That is normal, but designate one person to provide final approval. Multiple rounds of conflicting edits are one of the most common reasons signage misses a production cutoff.
Send a proof internally with a firm response deadline. If a sponsor logo has not arrived, leave a planned placeholder only if the sign can still work without it. Waiting until the final hour for one minor update can hold up an entire display package.
Order Hardware, Finishing, and Accessories Together
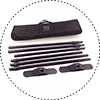
Printed graphics are only one part of the order. Ask how each piece will be displayed and mounted. A banner without grommets, rope, or the proper hanging method is not ready for installation. A retractable banner graphic needs the correct base, pole, and carrying case. A rigid sign may require easel support, standoffs, adhesive, or a frame depending on the venue.
For events with multiple pieces, order the accessories at the same time so they arrive together. This includes banner stand hardware, weighted bases for flags, clips, hooks, bungee cords, grommets, pole pockets, table throw sizing, and transport cases. If setup is happening after business hours or during a narrow venue loading window, you do not want a team making an emergency supply run for zip ties or mounting tape.
It also helps to consider reuse. A dated event banner may only be useful once. A clean branded backdrop, retractable banner stand, or fabric display without dates can support future meetings, presentations, and trade shows. If budget allows, place changing details on replaceable posters or decals while keeping your larger display hardware evergreen.
Build the Production Schedule Around the Event Date
When you order event signage, the event date is not the only deadline. Work backward from the time the signage must be installed, not when doors open. Include venue access, delivery time, assembly, and time for corrections if something changes.
For a standard event, finalize the sign list and measurements first, then approve artwork, then place the order with enough time for production and pickup or delivery. For urgent NYC needs, same-day banner printing and local production can be the right solution, but only when files, dimensions, quantities, and finishing details are already confirmed.
Same-day service is especially useful for a corrected date, a replacement banner, a newly confirmed sponsor, or an unexpected activation. It is not a substitute for deciding what you need. Large quantities, specialty materials, custom structures, and complex installations may require more lead time. Be direct about your deadline so the production team can recommend realistic options.
Confirm Pickup, Delivery, and Setup Details
The final order details matter as much as the artwork. Confirm who is picking up the signs, what vehicle they are using, and whether the package will fit. Large rigid boards, backdrops, and trade show displays can require a van or larger vehicle. If delivery is going directly to a venue, provide the receiving contact, event name, date, loading dock instructions, and room or booth number.
At setup, unpack every item before the rush begins. Check quantities, hardware, and visible print quality. Assemble one banner stand or display first to confirm the graphic orientation. Keep extra tape, cutters, cleaning cloths, and fasteners in the event kit. For outdoor setups, confirm that all freestanding signage has appropriate weight and is permitted by the venue or property manager.
For fast, event-ready production in New York, Print Banners NYC can help simplify the format and turnaround decisions. The strongest order is still the one built around a clear sign plan, correct files, and enough time to install each piece where it will do the most work.